Feeling overwhelmed by the ticking clock during your architecture practical exam? You’re not alone—time management remains one of the biggest hurdles students face today.

With the growing complexity of design tasks and tighter exam schedules, mastering how to efficiently allocate your time can make all the difference between stress and success.
In this post, I’ll share proven strategies that helped me stay calm and focused under pressure, turning chaotic moments into productive bursts of creativity.
Stick around, because these tips could be your game-changer when it’s your turn to showcase your architectural skills.
Breaking Down the Exam Into Manageable Segments
Chunking Tasks to Reduce Overwhelm
When I first tackled my architecture practical exam, the sheer volume of work felt like staring at a mountain I had to climb in one go. What really helped was breaking the entire task down into smaller, bite-sized chunks.
Instead of thinking about completing the entire project in one stretch, I divided it into phases—concept sketching, drafting, detailing, and final touches.
This approach made the workload feel less intimidating and gave me clear mini-goals to hit, which kept my motivation high. It’s a bit like eating a large meal one bite at a time rather than trying to swallow it whole.
Allocating Time Blocks for Each Phase
Once the tasks are chunked, assigning specific time slots to each is critical. For example, I would give myself 30 minutes for initial sketches and an hour for detailed drafting.
What I realized from experience is that setting a timer or watch nearby helped keep me honest with my pace. If I noticed I was spending too long on a single section, I’d consciously push myself to move on to avoid running out of time later.
This way, I avoided the trap of perfectionism early on, which can be a silent time killer.
Adjusting Flexibly Without Panic
Of course, not everything goes perfectly according to plan. Some parts demand more attention, and others wrap up quickly. I learned to stay flexible by keeping a little buffer time in each segment.
Instead of rigidly sticking to the clock, I allowed myself small adjustments, as long as I stayed aware of the overall progress. This mindset helped me stay calm because I knew that minor shifts were okay and didn’t mean I was failing at time management.
It’s about balancing discipline with a bit of grace under pressure.
Prioritizing Key Elements to Maximize Impact
Identifying High-Value Sections Early
One tip that made a huge difference was figuring out which parts of the exam carried the most weight or showcased my strengths best. For example, if the exam emphasized conceptual clarity or spatial organization, I made sure to dedicate extra time perfecting those areas.
Early on, I skimmed through the entire brief and highlighted the critical elements. This helped me avoid spending too much time on less important details and ensured my efforts had the biggest payoff.
Using Sketches as Quick Visual Checkpoints
Sketching out rough ideas quickly turned out to be a lifesaver. When I jotted down fast sketches, it served as a visual checkpoint to see if my design was on track.
These quick visuals helped me assess if I was meeting the exam criteria without getting bogged down in minute details. It’s like having a quick map that tells you if you’re still on the right path or need to pivot before investing too much time.
Final Review Focused on Presentation Quality
Towards the end, I reserved time for polishing presentation aspects like clean lines, legible notes, and balanced shading. From my experience, a neat presentation can elevate a good design by making it easier for examiners to understand your ideas.
Even if some parts were rough, a clean and organized sheet gave the impression of control and professionalism. Prioritizing this last step within your time frame can improve your overall score significantly.
Streamlining Tools and Workspace for Efficiency
Preparing Your Materials Ahead of Time
Nothing wastes more time than hunting for missing tools mid-exam. Before starting, I always laid out all my essential supplies—pencils, erasers, rulers, templates, and scales—in an orderly fashion.
This preparation created a smooth workflow and minimized interruptions. Trust me, when the clock is ticking, the last thing you want is to scramble for a missing compass or sharpener.
Having everything within arm’s reach saved me precious minutes.
Choosing Familiar Tools Over Fancy Gadgets
While it’s tempting to bring all the latest gadgets, sticking to tools you know well beats unfamiliar tech under pressure. I once tried using a new digital measuring tool and ended up fumbling with it, losing valuable time.
Using familiar instruments you’ve practiced with extensively reduces errors and speeds up execution. Comfort and muscle memory count more than flashiness in a high-stakes exam.
Keeping Your Workspace Clean and Organized
A cluttered desk equals a cluttered mind. I made it a point to clear my workspace regularly during the exam. Tossing scraps and aligning sheets helped me maintain focus and avoid distractions.
When your area is neat, it’s easier to switch between tasks and quickly find what you need. This habit also gave me a psychological boost—seeing order around me translated into feeling more in control of the exam.
Managing Stress to Maintain Sharp Focus
Breathing Techniques to Reset the Mind
When the pressure mounted, I used simple breathing exercises to calm my nerves. Taking a few deep breaths helped slow my racing thoughts and refocus. I found that even a quick 30-second pause with deep inhales and exhales could lower anxiety and improve concentration.
This small trick prevented me from spiraling into panic, which often wastes more time than it saves.
Positive Self-Talk to Build Confidence
I caught myself sometimes thinking, “I’m running out of time” or “This won’t be good enough.” Shifting those thoughts to positive affirmations like “I’m prepared,” or “I can handle this” made a noticeable difference.
Confidence isn’t just a feeling; it’s a tool that helps you work more efficiently. Encouraging yourself keeps your brain engaged and less distracted by doubts.
Short Breaks to Refresh Your Perspective
Although it sounds counterintuitive, taking brief breaks—like standing up or stretching for 30 seconds—helped me recharge mentally. These micro-breaks prevented fatigue and allowed me to return to the drawing board with fresh eyes.
I treated these moments as mini-rewards for hitting milestones, which kept my motivation steady throughout the exam.
Utilizing a Time Allocation Chart for Clear Guidance
Visualizing Your Schedule for Better Control
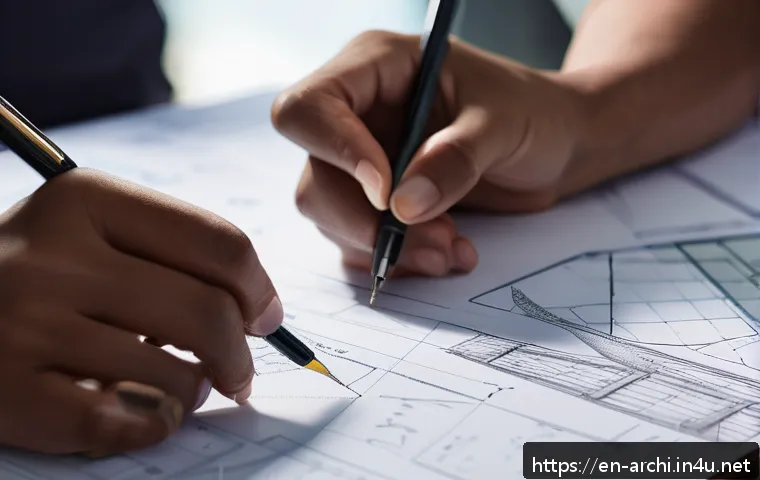
One of the most useful strategies I adopted was creating a simple time allocation chart before starting. This chart acted as a visual roadmap, showing how much time I planned to spend on each section.
Seeing it laid out helped me pace myself and avoid the temptation to linger too long on one part. It was like having a personal coach whispering reminders to keep moving forward.
Tracking Progress During the Exam
I kept a small notebook beside me where I ticked off completed tasks against the planned time blocks. This real-time tracking gave me a tangible sense of accomplishment and alerted me if I was falling behind.
It’s surprising how motivating it is to see your progress visually, especially when the clock seems relentless.
Adjusting the Chart Based on Real-Time Feedback
If I noticed some sections took longer than expected, I recalibrated the chart on the fly, shifting time from less critical parts. This flexibility ensured that I prioritized finishing the exam fully rather than getting stuck trying to perfect one area.
The chart wasn’t a rigid rule but a helpful guide that adapted to the flow of the exam.
| Task Phase | Planned Time | Actual Time | Notes |
|---|---|---|---|
| Concept Sketching | 30 minutes | 28 minutes | Focused on quick ideation, avoided over-detailing |
| Drafting | 60 minutes | 65 minutes | Spent extra time on spatial layout, slight delay |
| Detailing | 45 minutes | 40 minutes | Streamlined details, prioritized key elements |
| Final Presentation | 30 minutes | 27 minutes | Cleaned lines and added shading for clarity |
| Buffer/Breaks | 15 minutes | 10 minutes | Used for brief rest and adjustments |
Practicing Under Simulated Exam Conditions
Recreating the Exam Environment
One game-changing approach was practicing full mock exams under timed conditions similar to the real test. I set up my workspace, gathered all materials, and strictly adhered to the time limits.
This exercise built familiarity with the pressure and helped me discover where I typically slowed down. Practicing like this multiple times made the actual exam feel less intimidating and more like just another practice session.
Analyzing Mistakes to Improve Efficiency
After each practice round, I reviewed what took too long or caused confusion. For example, I noticed I often spent extra time deciding on scale or orientation, so I worked on speeding up those decisions.
This iterative process helped me refine my workflow and develop shortcuts without sacrificing quality. Mistakes became stepping stones rather than setbacks.
Building Muscle Memory and Confidence
Repeated practice ingrained habits that became almost automatic during the real exam. For instance, I developed a rhythm for sketching and drafting that balanced speed with precision.
This muscle memory reduced hesitation and boosted my confidence dramatically. When the exam day arrived, I trusted my routine, which helped me stay calm and efficient throughout.
Leveraging Technology Wisely During Preparation
Using Digital Tools for Practice, Not During the Exam
While most architecture practical exams restrict digital tools, incorporating them during preparation can be a huge advantage. I used software like SketchUp and AutoCAD to experiment with ideas quickly and understand spatial relationships better.
This digital practice accelerated my design thinking, making my hand-drawn work more confident and informed.
Recording Your Practice Sessions
I found it helpful to time myself while recording my practice sessions, either through video or audio notes. Reviewing these recordings gave me insights into my pacing and habits I wasn’t aware of, like spending too long on certain details or hesitating before decisions.
This feedback loop was invaluable for fine-tuning my approach.
Balancing Digital and Manual Skills
Ultimately, the exam tests manual drafting skills, so I balanced digital practice with lots of hand-drawing exercises. This combo helped me transfer conceptual clarity from digital models to clean, precise manual sketches under time constraints.
It’s about using technology to enhance your understanding while mastering traditional skills for execution.
Building a Mental Game Plan for Exam Day
Visualizing Success and Workflow
Before the exam, I spent time mentally walking through each step, imagining myself calmly working through the tasks. This visualization created a mental blueprint that helped reduce anxiety.
It’s like rehearsing a play—you know your lines and cues, so you perform better under the spotlight.
Setting Realistic Goals and Expectations
Rather than aiming for perfection, I set achievable goals for each section. This mindset took the pressure off and allowed me to focus on progress over perfection.
Knowing that minor imperfections wouldn’t ruin my entire exam helped me maintain steady momentum and avoid burnout.
Developing a Post-Exam Reflection Habit
After finishing the exam, I made a habit of jotting down what worked well and what didn’t. This reflection wasn’t about self-criticism but about learning and growth.
It prepared me better for future exams and kept me motivated to improve continuously. Having this mental debrief gave me closure and a sense of accomplishment regardless of the outcome.
In Conclusion
Breaking down a complex exam into manageable parts can transform an overwhelming task into achievable steps. By prioritizing key elements, organizing your workspace, and managing stress effectively, you set yourself up for success. Remember, flexibility and preparation are your best allies. With consistent practice and a positive mindset, you can confidently face any exam challenge.
Helpful Tips to Remember
1. Break your tasks into smaller, clear segments to maintain focus and reduce anxiety.
2. Allocate specific time blocks for each phase and use a timer to stay on track.
3. Keep your tools and workspace well-organized to avoid wasting precious time.
4. Practice under simulated exam conditions to build familiarity and muscle memory.
5. Use positive self-talk and breathing techniques to manage stress and maintain concentration.
Key Takeaways
Effective exam preparation hinges on thoughtful time management, clear prioritization, and mental resilience. Dividing your workload into smaller chunks and adjusting your plan flexibly can prevent burnout and improve efficiency. Equally important is the organization of your materials and maintaining a calm, confident mindset throughout. Practicing realistically and reflecting on your performance will help you continually refine your approach and maximize your potential on exam day.
Frequently Asked Questions (FAQ) 📖
Q: How can I effectively plan my time during an architecture practical exam?
A: The key is to break down the exam into manageable segments before you even start drawing. Allocate specific time blocks for brainstorming, sketching rough ideas, refining details, and final touches.
For example, if you have three hours, spend the first 30 minutes outlining your concept and key elements, the next hour on detailed drawings, and the last 30 minutes reviewing and polishing.
I found that using a simple watch or timer helped me stay aware without obsessing over every second, which kept my focus sharp.
Q: What should I do if I feel stuck or overwhelmed midway through the exam?
A: It’s totally normal to hit a mental block under pressure. When that happens, take a brief pause—close your eyes, take a deep breath, and mentally step back from the task for 30 seconds to a minute.
This quick reset can clear your head and reduce anxiety. Also, remind yourself that perfection isn’t the goal; clarity and communication of your ideas matter most.
I used to jot down quick keywords or sketches on a separate sheet to get unstuck, which often sparked fresh ideas and boosted my confidence.
Q: Are there any practical tools or techniques that help improve speed without sacrificing quality?
A: Absolutely. One trick I swear by is preparing a personal template or a set of standard symbols and notations that you can quickly incorporate during the exam.
This saves time on repetitive drawing elements. Additionally, mastering basic hand sketching techniques and practicing with real exam time constraints beforehand can drastically improve your speed.
Using a ruler and fine liners for clean lines also helps reduce the need for corrections, which saves precious minutes. From my experience, consistent practice under timed conditions was the biggest game-changer.